Webex video integration for ScreenPal
ScreenPal integrated with Webex for easy editing and sharing.
How to set up ScreenPal with Webex:

Sign up
Get started with a Deluxe, Premier, or Max subscription.

Connect

Edit & Share
Click on the video thumbnail to import your recording. Use the ScreenPal video editor to edit your meeting video and share.
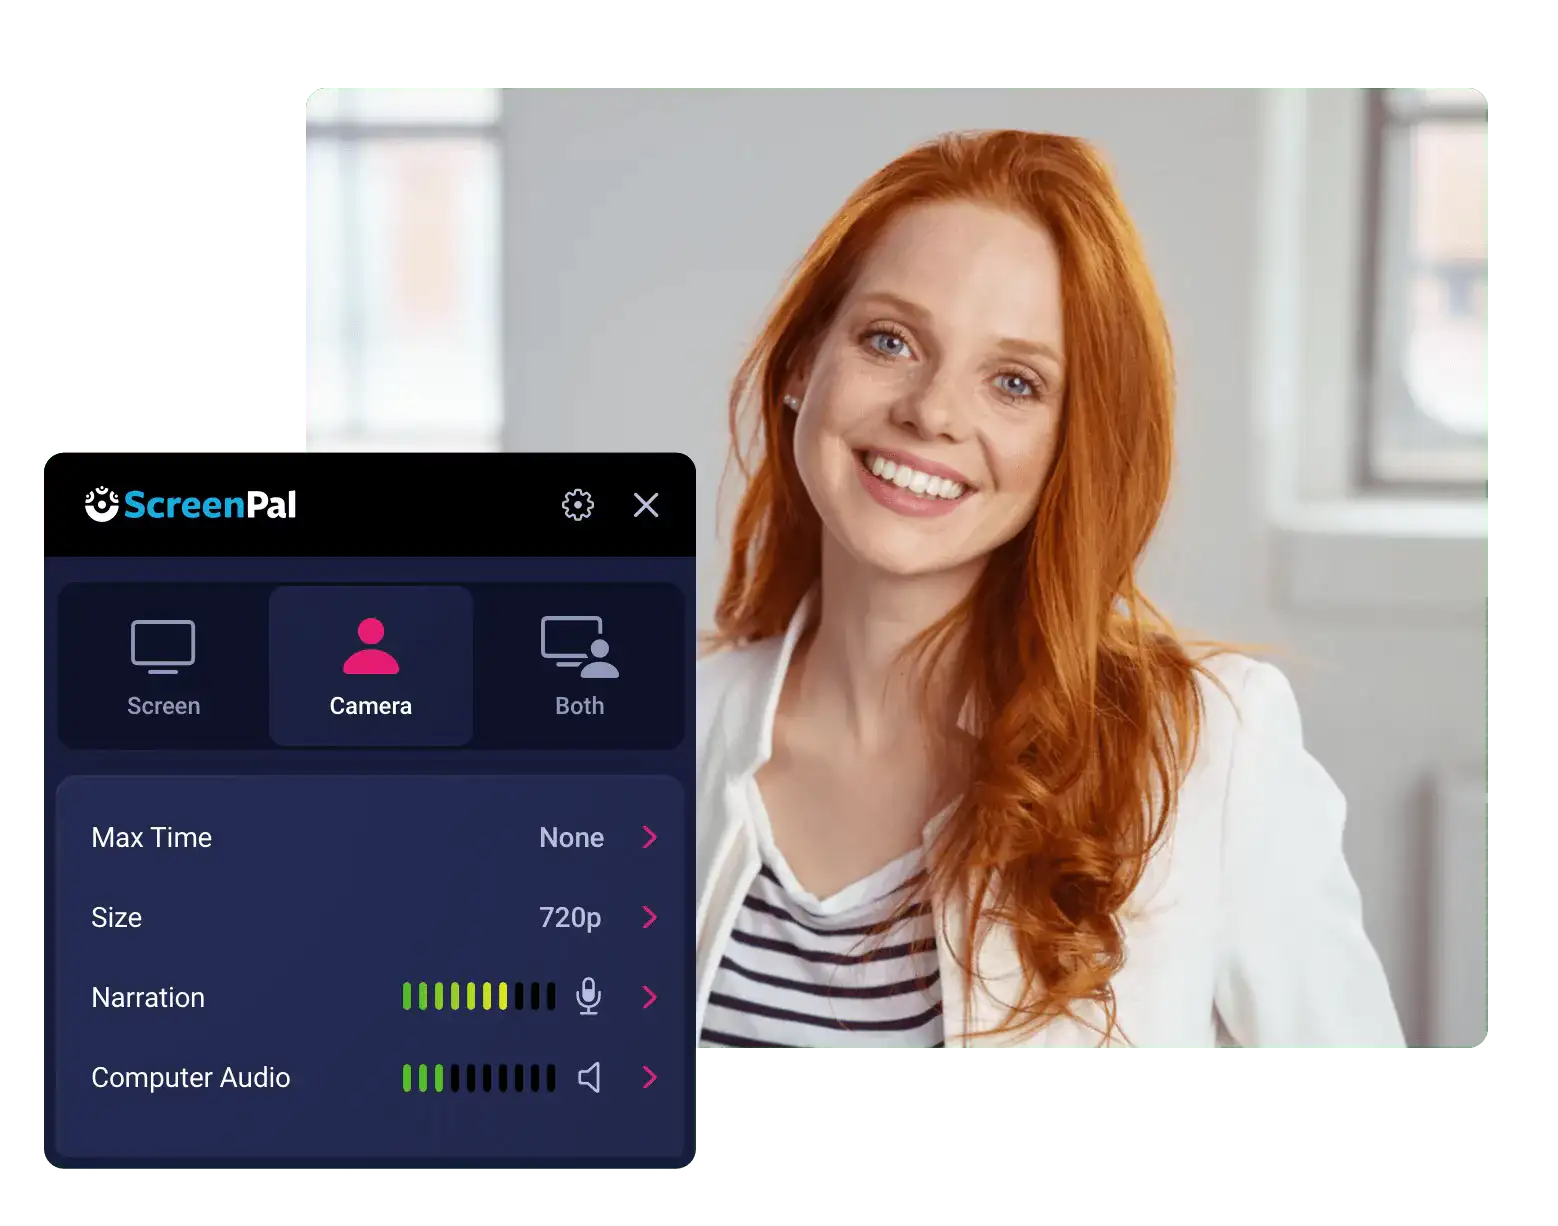
Record your meeting or webinar
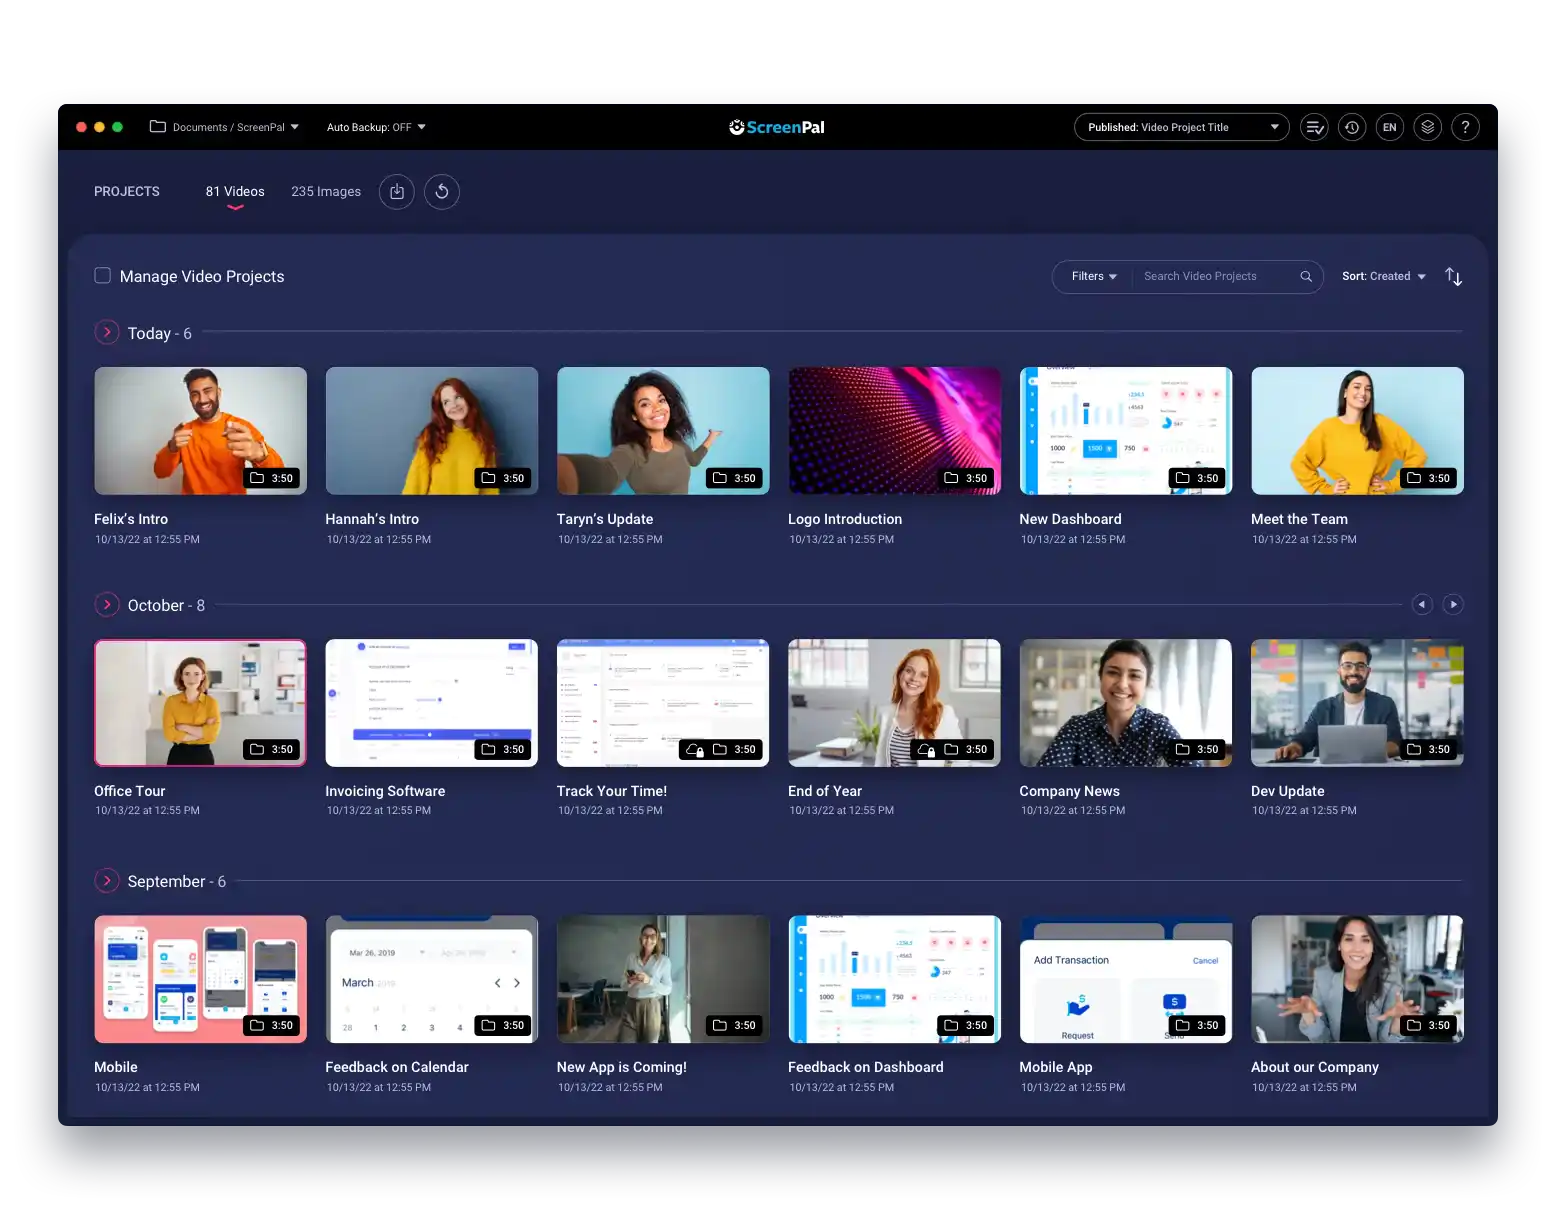
Connect with Webex
Click “Connect” in the ScreenPal content manager. Easily connect with your local or cloud recordings. Click on Webex meeting thumbnails to easily import videos.
Need help?
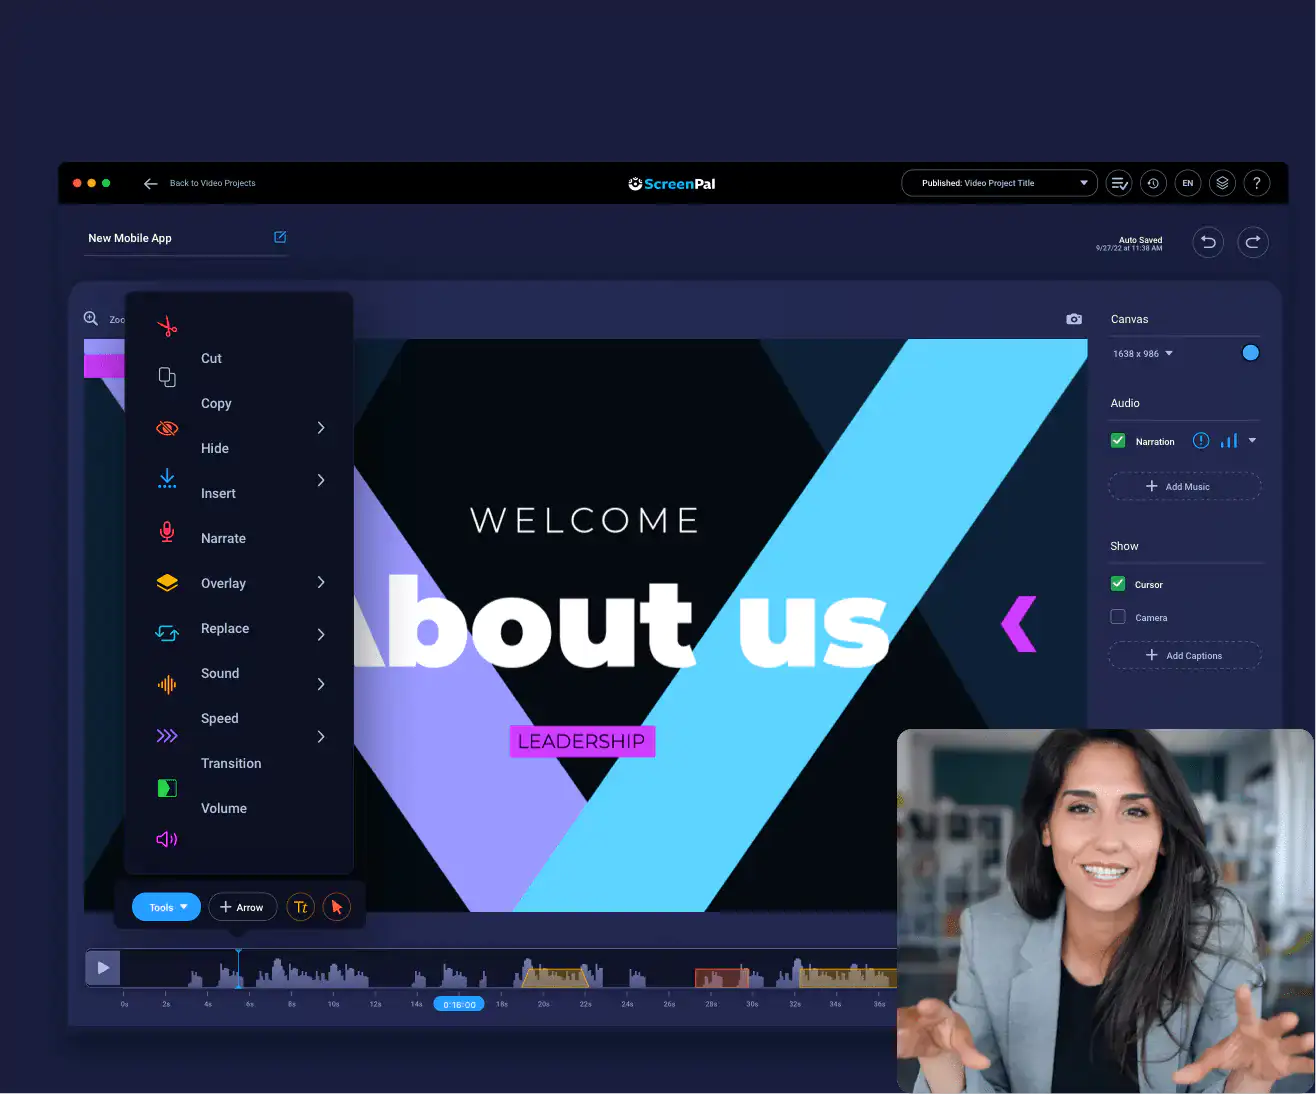
Edit Webex recordings and transform your meeting video
Mix and match videos and media. Trim, crop, and cut segments of your videos. Edit audio, replace narration and add music. Clean up or replace captions.
Highlight and zoom in/out on specific areas of your screen. Add text, shape, blur, image, and video overlays including from our stock media library. Add animations and transitions for effects.
Share your Webex Meetings
Take advantage of our intuitive cloud hosting and sharing platform. Get a shareable link or embed code to use on your LMS, or other applications.
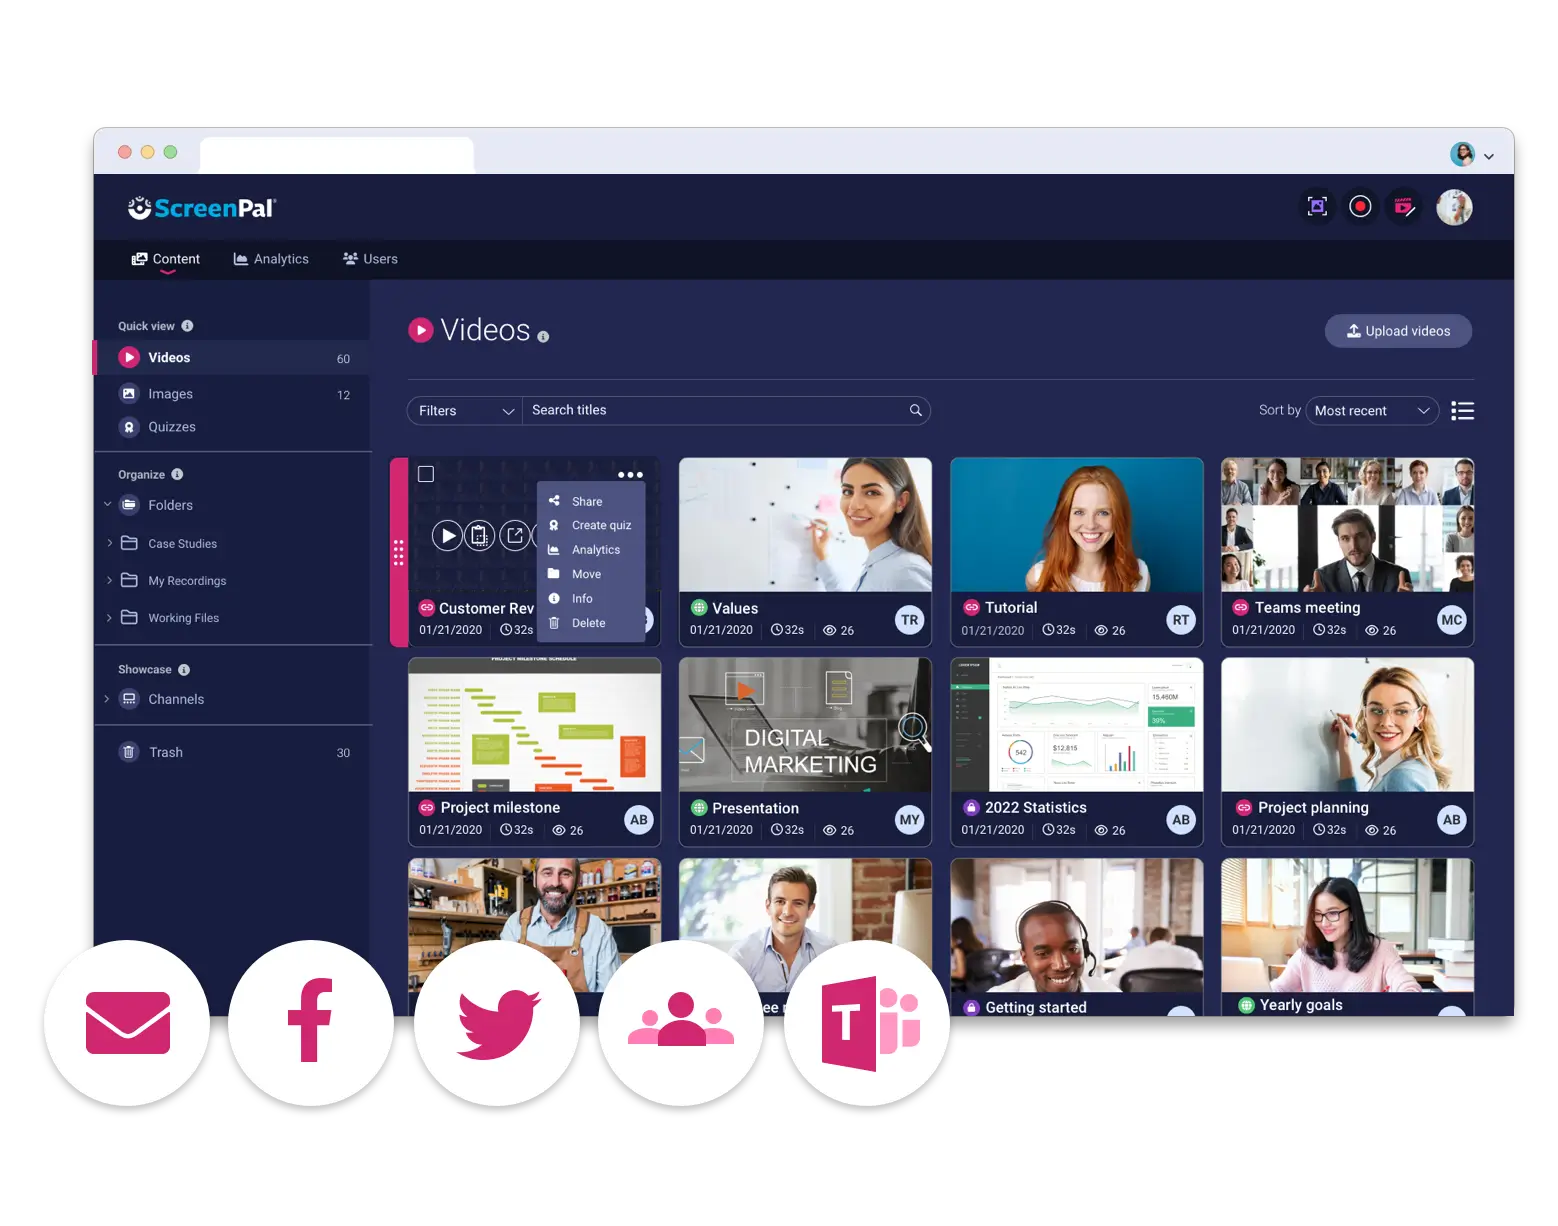
Organize your content into folders using drag and drop. Share folders to collaborate with teammates. Create video channels, choosing the play order for your audience.
Personalize the video viewing experience with a custom player and thumbnail. Upload to other popular cloud hosting services or save to your computer.